

- Allow-Listing X-Headers is necessary in order for CyberHoot to send simulated phishing emails to bypass your mail filter. We recommend whitelisting by IP address or hostname but depending on your system setup, allow-listing by headers may be the most fitting way to ensure phishing test emails are delivered to your user’s inboxes. Follow the instructions below to allow-list our headers:
Bypassing Clutter and Spam Filtering by Email Header (Exchange 2013, 2016, and M365)
- Log into your mail server admin portal and select Exchange under Admin center.

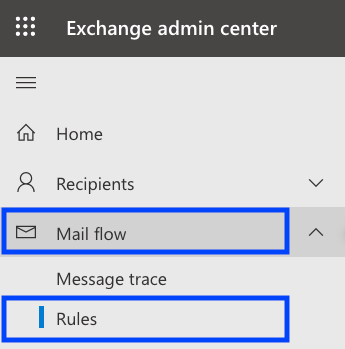
- Click Mail flow
- Click Rules
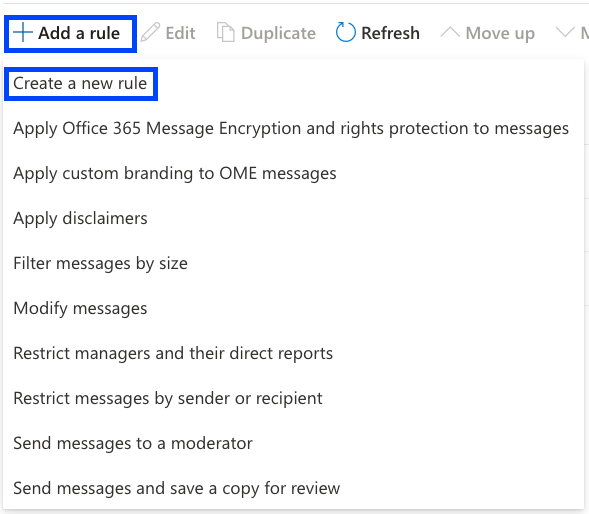
- Click Add a rule
- In the new rule window, click on Create a new rule
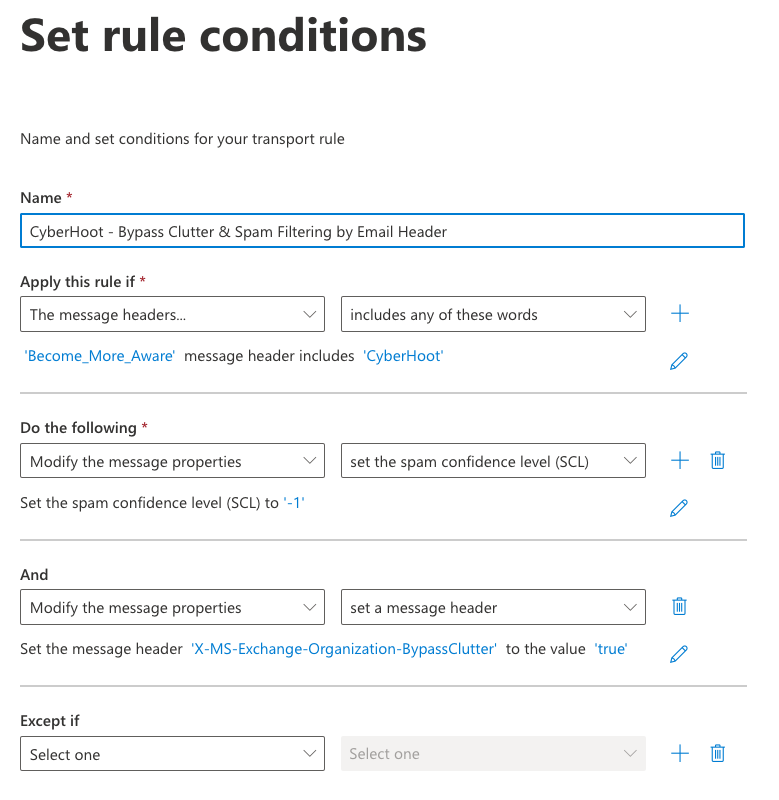
- Give the rule a name, such as “CyberHoot – Bypass Clutter & Spam Filtering by Email Header”.
- From the Apply this rule if… drop-down menu, select The message headers… then includes any of these words.
- Under those boxes, you will see *Enter text… and *Enter words…
- Click *Enter text… and type in the header name: Become_More_Aware and click on save.
- Click *Enter words … and type in CyberHoot and click the Add button and Save button.
- Next, under Do the following… ensure that this field on the left is set to Modify the message properties and set the spam confidence level (SCL) is set on the right side.
- Add a second action under the Do the following, by clicking the + sign (add action) button.
- From the drop-down menu, select Modify the message properties on the left side and set a message header on the right side
- Click the first *Enter text…. and type X-MS-Exchange-Organization-BypassClutter and hit save, then click the second *Enter text… and type true and hit save.
- Review all settings to make sure they are correct. It should look like this:
- Click on Next.
- As a best practice, we recommend leaving the other options at their default settings.
- Click on Finish.
Bypassing the Junk Folder (M365 mail servers ONLY)
This rule will allow only simulated phishing emails from CyberHoot to bypass the Junk folder to ensure that your users are receiving simulated phishing emails in their inboxes.
- Under Admin center for M365 Exchange.
- Click Mail flow
- Click Rules
- Click Add a rule
- In the new rule window, click on Create a new rule
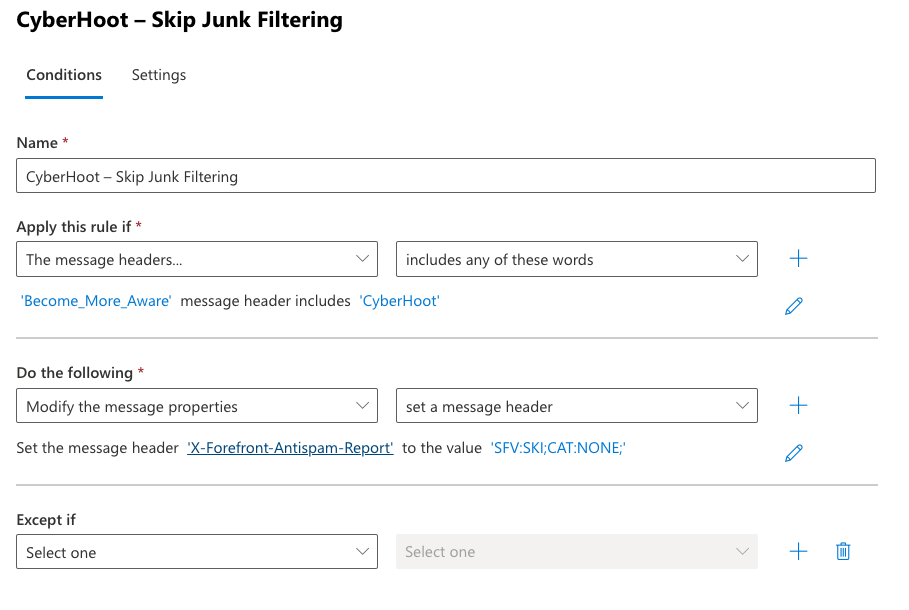
- Give the rule a name, such as “
CyberHoot – Skip Junk Filtering”.
- From the Apply this rule if… drop-down menu, select The message headers… then includes any of these words.
- Under those boxes, you will see *Enter text… and *Enter words…
- Click *Enter text… and type in the header name: Become_More_Aware and click on save.
- Click *Enter words … and type in CyberHoot and click the Add button and Save button.
- Next, under Do the following… ensure that this field on the left is set to Modify the message properties and set the spam confidence level (SCL) is set on the right side.
- Add a second action under the Do the following, by clicking the + sign (add action) button.
- From the drop-down menu, select Modify the message properties on the left side and set a message header on the right side
- Click the first *Enter text…. and typeX-Forefront-Antispam-Report (this value is case sensitive) and hit save, then click the second *Enter text… and enter “SFV:SKI;CAT:NONE;” (this value is case sensitive) and hit save.
- Click Next
- On the Set rule settings page, click Next, leaving the other values at their default settings.
- Set the priority to directly follow the rule you created in the previous section above.
- Review all settings to make sure they are correct. It should look like this:
- Make sure all options are filled out correctly.
- Click Save
Once you have completed this setup please allow time for the new rules to generate. Then, set up a test phishing campaign for yourself or a small group to test out your new whitelisting rule.
Setting Advanced Delivery on Microsoft Defender to Allow Phishing Simulation
This will configure the IP addresses and sender domains that are used by CyberHoot as part of your phishing simulation email. These email messages are delivered unfiltered..
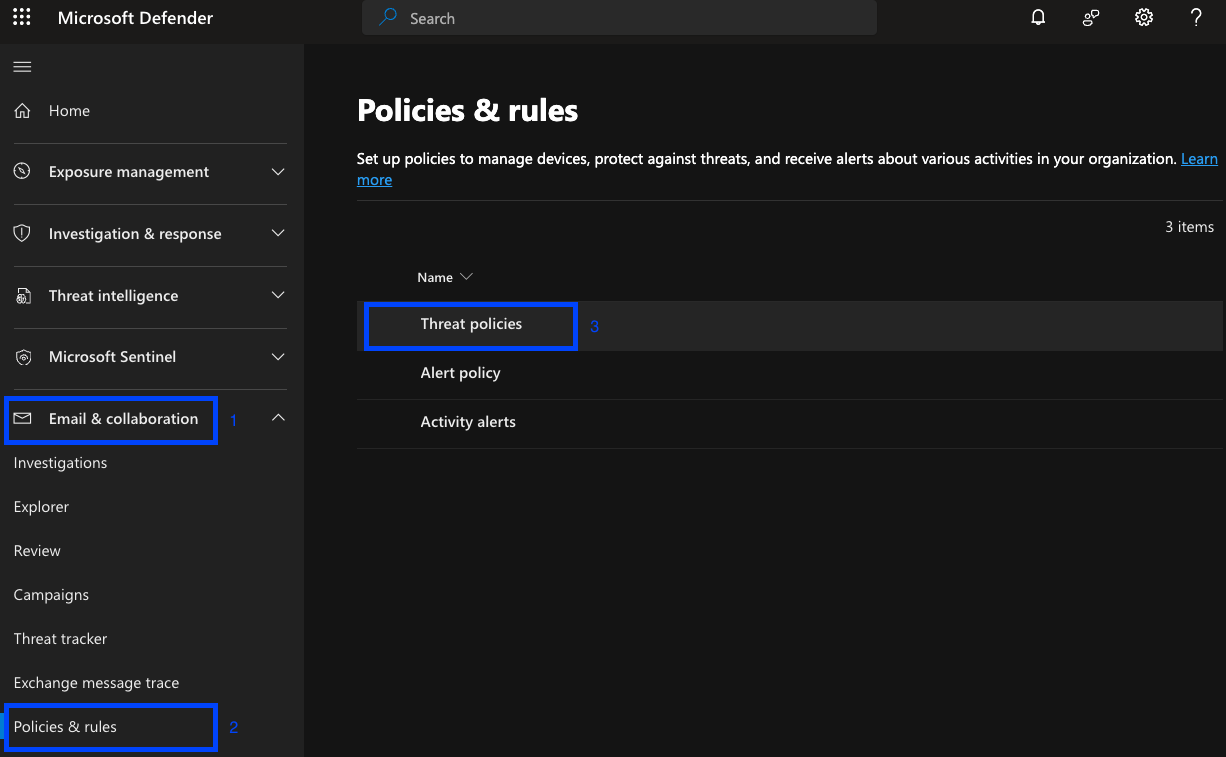
- Log into Microsoft Defender.
- On the left side, click on Email & Collaboration then click on Policies & Rules
- Click on Threat policies.
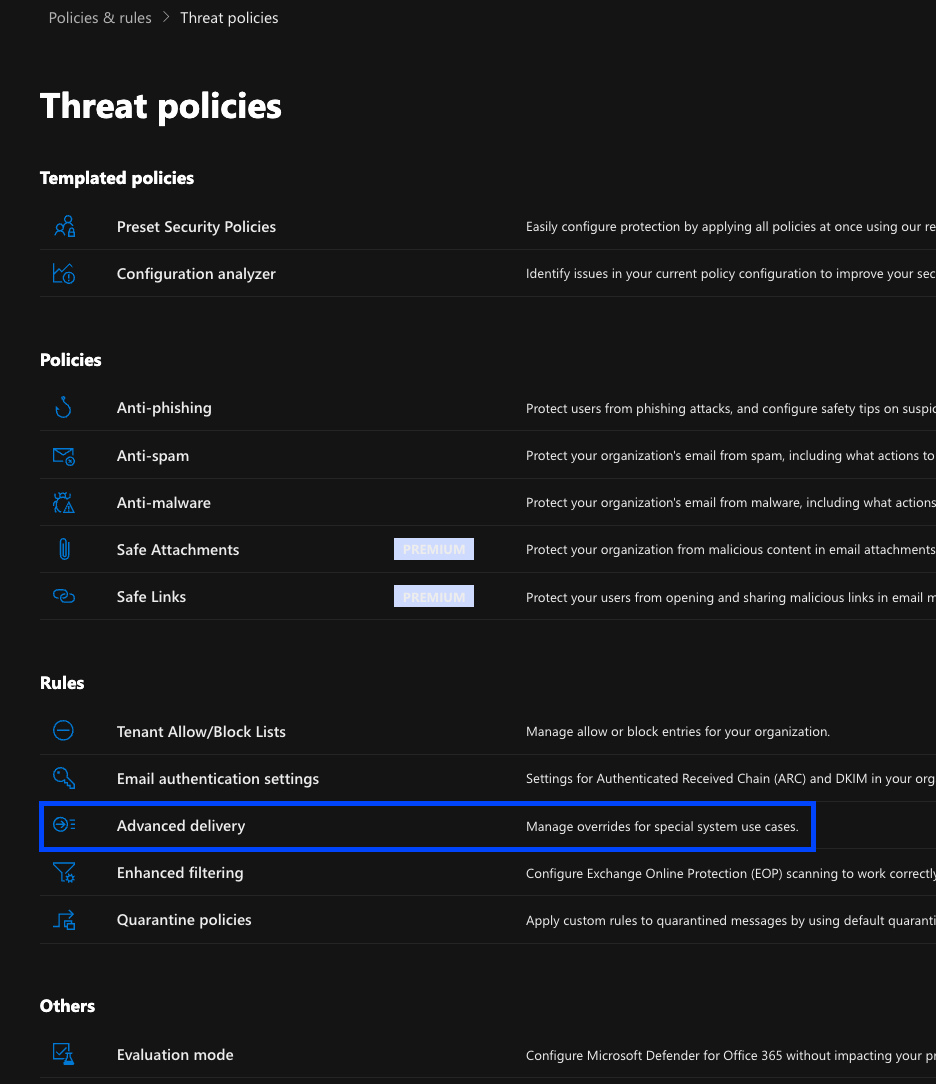
- Click on Advanced delivery.
- Under Advanced delivery, click on Phishing Simulations.

- Click on Add, (unless you already have configured phishing simulations, otherwise click on Edit.)
- Add the Domains and IP addresses listed in this document.
- The final screen should look like this.
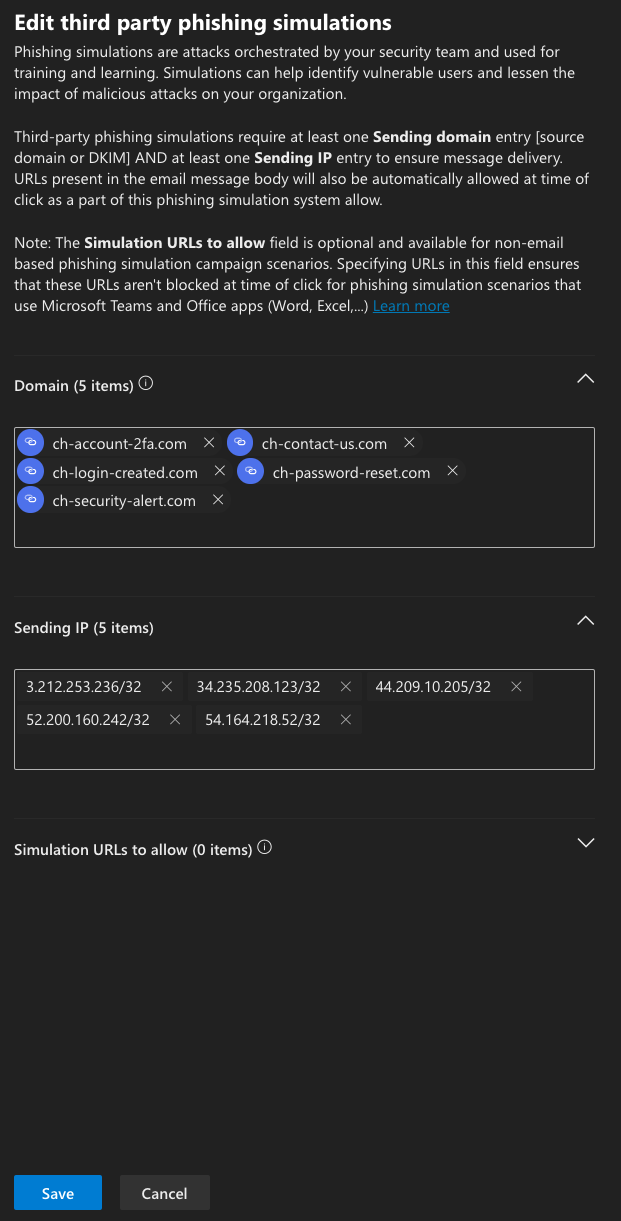
- Click on Save.
Once you have completed this setup please allow time for the new rules to generate. Then, set up a test phishing campaign for yourself or a small group to test out your new whitelisting rule.
If you are looking for more assistance, head to our HowTo Library, or contact [email protected].